Posts

Showing posts with the label Tool Kit 02

Toolkit 02: Reflective Statement

Unlike Premise, I have had a better time managing and finishing toolkit 02 because I started earlier in the year and was able to get some of the heavier and more complicated elements out of the way, but at the cost I think to some of my other projects.  I think, from last year I was able to manage toolkit 02 a lot easier by getting the work out of the way as fast as I could, which also was how I approached Jetpack Jones, as I knew I wanted to try and finish the tutorials in term time, so I could better understand how long the process would take and if I could feasibly do it for third year. This is also why I also rushed and made a lot of mistakes when I was finally able to finish the model. I am a mixture of happy and also underwhelmed about the outcome of my model, because I was able to finish what I set out to do, however the issues that currently plague the model, such as the obvious thinning on the cheeks and the lack of detail on the suit due to problems I had transferri...

Toolkit 02 Submission

Life Drawing Week 01 Week 02 Week 03 Week 04 Week 05 Week 06 Week 07 Week 08 Week 09 Week 10 Week 11 Week 12 Week 13 Week 14 Lighting and Rendering 01: Arnold Part 02 Part 14 Part 16 Part 17 Part 18 Part 19 Part 20 Part 21 Part 22 Part 23 Part 24 Part 25 Part 26 Part 27 Jetpack Jones Head Modelling 01 02 03 04 05 06 07 08 09 Body Modelling 01 02 03 04 05 UV Layout 01  Skinning  01   02  03 04 (Body) Rigging  01  02  03 04 Facial Rigging Part 01-3 01 02 03 04 05 06 07 08 09 10 11 12 Texturing 01 02 03 04 05 06 07 08 Turn Around 01  Final Render and Turn Around Mudbox Videos Introduction - Layers: Working with Scu...

Moom Platform: Blocking Removed and Graph Editor Improvements

Image
For this lesson we had to think about timing and had to try and a-just the animation to the characters movements by removing the blocking and trying to line up the time with the movement and the expressions. I found this lesson quite easy especially since I feel I am now more used to blocking and animating using that technique, however I am still not, I feel as comfortable with using the graph editor, but In the second video I think my attempt to try it on the hip CTRL worked well, and although I still feel like the animation needs some more cleaning, I think it's turning out rather well.

MudBox: Introduction - Layers: Working with Sculpt Layers

Image
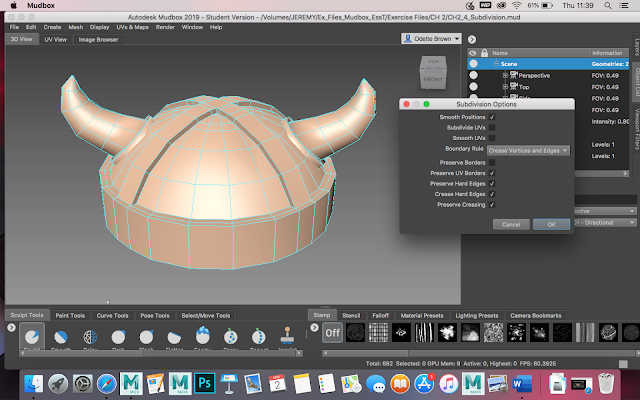
Original Un-tick Creases and Hard Edges on Subdivision Options  Hot-key (Shift D) on Helmet only  (Shift D) on Both  Turn off Everything on Subdivision Options (Accept Preserve UV border and Smooth Position) Working With Sculpt Layers: Locked Layers Layer Edit: New Layer and Layer Number Edit  Editing on Two Separate Layers I have started on the Linkdn Learning tutorials for Mudbox and so far I think its going well, although I am struggling to adjust to the software (despite the fact I have my hotkeys set to Maya preferences). I think I am getting the hang of at this point, the layers and the number association with the editing of the model, however I am on a laptop, so cannot switch between the layers as easily, so am having to do it manually on the options, but apart from that I think I am getting a good grip on how to use some of the features at this point.  I know I will have to do a bit of investigation beca...

Toolkit 02: Checklist

Life Drawing 01  Life Drawing 02 Life Drawing 03 Life Drawing 04 Life Drawing 05 Life Drawing 06 Life Drawing 07 Life Drawing 08 Life Drawing 09 Character Design 01 Character Design 02 Character Design 03 Character Design 04 Character Design 05 Character Design 06 Character Design 07 Character Design 08 Character Design 09 Character Design 10 Character Design 11 Character Design 12 Character Design 13 Character Design 14 Character Design 15 Character Design 16 Character Design 17 Character Bible  Moom Poses 01  Moom Poses 02 Weight Lifting 01  Weight Lifting 02 Weight Lifting 03 Weight Lifting 04 Lighting and Rendering 01 Lighting and Rendering 02 Lighting and Rendering 03 Lighting and Rendering 04 Lighting and Rendering 05 Lighting and Rendering 06 Lighting and Rendering 07 Lighting and Rendering 08 Lighting and Rendering 09 Lighting and Rendering 10 Lighting and Renderi...

Character Design: Astronaut Research and Item Drawings

Image
In the second half of the lesson we had to apply the research skills we learned in the first half and put them towards practicing researching our assigned character. For my astronaut I decided to try and stick mostly to 1960's designs and research because thats the theme I will have to look at later on in the project so I decided that it would be easier to start looking at now so I wouldn't have to change the design later on down the project. At first I looked at helmets and suits, but then later I felt that the astronaut didn't have as much of a personality shining through the suit so I thought it might also be fun to look at 60's themes toys and items to present the era and the tone of the character more, as at this point I think I want them to be lighthearted and fun.

Toolkit 02: Animation Posing

Image
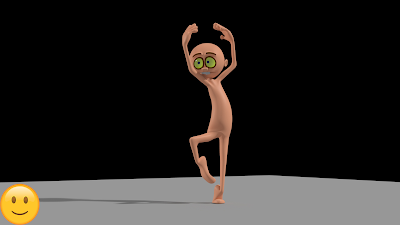
For this lesson we modelled various action poses onto a character rig called "Moom" in order to help us practice how to use a human rig and create more realistic, action poses on an animated figure. For the fives images I did I felt that some of them went well and others went okay, the three that were successful and I paired with the emoji "He Lives" because I think the rig didn't break at any point and the movements are realistic enough to portray movement in the image. The two that I paired with the emoji for "Accident and Emergency" is because in the final render I can see were the model has broken, for example in the second to last image, the right shoulder is twisted unrealistically because I struggled to get the hand and the arm to turn in two different directions on the model and get the elbow to bend to show the weight of the pose, so it ended up breaking.